Sample Workflow
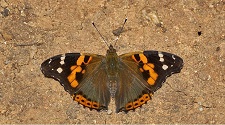
1) Photo -- Select

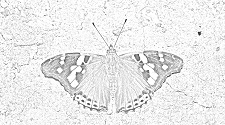
2) Sketch -- Convert

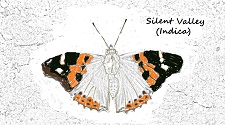
3) In Progress -- Enhance

Page Eight: The Workflow
A Walk Through the Skills Development Process
Let's take a closer look at a day in the lives of students working their
ways through the "10 Butterflies" project.
1) Photo Selection. The photos are taken from any number of web
sites that offer Public Domain or Fair Use artwork or photography; for
example, Wiki Commons.
2) Screen Capture. Once the photo has been selected, a screenshot
is made with the Snipping Tool. It is then saved as a .jpg to a folder, named according to a consistent convention, such as " 01_monarch." The naming method is not as important as it is to be consistent throughout the project. Also, it is better to not make the working pictures too small, especially at first.
Sizes in the 6-800px leave more room to work than smaller sizes.
3) Prepare the Graphic.
Using Fotosketcher, render the photo to a pencil sketch.
With MS Paint, crop and note the size, using the resize function. Title according to consistent convention, e.g. "monarch_600X400.jpg"
4) Size the Sketch
It is important to control the sizes and to add the size to the name. Open the sketch in MS Paint, note the size in pixels, and add the size to the title. Taking the time to note the size might seem picky at first. In the long run, it saves unnecessary time and work. Underscores are preferable to spaces.
5)Color and Enhance the Sketch Experiment and find personal preferences, using all three graphics programs: Sketchbook, Fotosketch, and MS Paint. Dimensions in the 700-900 range provide a good starting point, too. Screen display may be changed
for ease of screen capture with Ctrl+ or Ctrl-.
Sample Workflow
1) Photo -- Select

2) Sketch -- Convert

3) In Progress -- Enhance
